

Helpful Set-up Steps for the Ever-So-Nifty ADS-1250W Scanner

In this two-part article I walk through the steps I took to set up my Brother ADS-1250W scanner, a nifty little piece of kit for office dwellers and road warriors alike.
Step 1 — Grab a hot cup of your beverage of choice; I hope you find this article entertaining!
Reasons
I purchased the Brother ADS-1250W multi-document scanner for a couple of reasons. Number one: low-cost. It was lower in price than a lot of competing products, at least at the time that I purchased it.
Second: portability. The scanner comes in a sleek package with several folding parts that make for easy storage and transport. I felt at the time of purchase that the ADS-1250W was a good bet for those occasions where I would be on the road.
Lastly: Linux compatibility. At home, I use Ubuntu 90% of the time with a 5% margin of error thrown in for good measure. The remainder is a mix between Mac OSX and Windows 10: call it an 80–20 split. A bunch of fancy numbers to say that Windows is not my OS of choice. There. I said it.
Unfortunately, there were more than a couple headwinds I encountered during set-up. I have captured the steps I took in the hopes that other road warriors will find them useful, particularly those who run Ubuntu or related flavours of Linux.
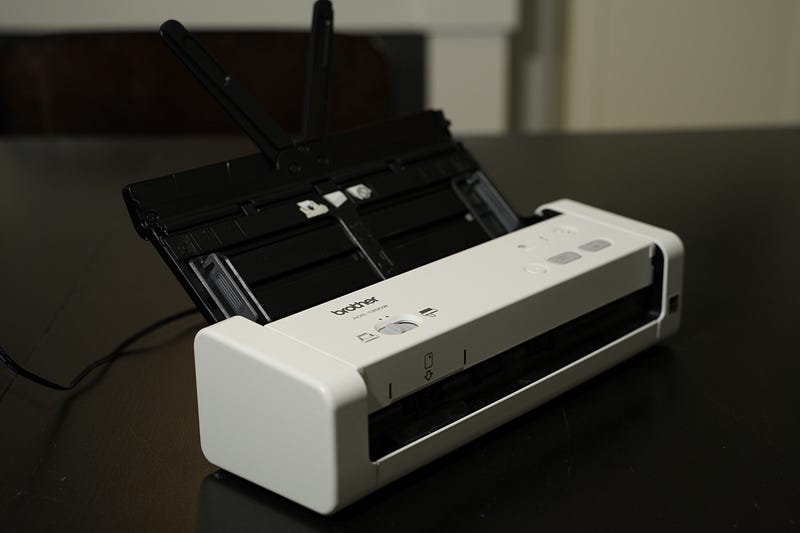
Despite Brother’s claim on their glossy brochure that the ADS-1250W is compatible with Linux, you DO need a Windows or Mac machine to perform the initial setup with your wireless network. This was confirmed to me via e-mail by the good people at Brother’s tech support centre. The ADS-1250W’s small size is nice; however, the tradeoff is that there is no display apart from one or two buttons that light up. Have you ever tried to get detailed diagonstics from a single blinking light? It is not all the fun and games it is cracked up to be.
Anyhoo, in order to connect the scanner to a wireless network you will need a USB cable as well as the set-up utility available either in Windows or Mac.
Necessary Bits and Pieces
The following instructions assume you are running Windows 10 although there are similar steps if you are running OSX. I attempted both during my initial forays into setting up my scanner; I ultimately settled on the Windows installer as I have dual-boot on my laptop. Call me crazy, call me lazy but I grew tired of running up and down the stairs constantly trying different configurations with my network whilst fanagling the scanner’s setup using my Mac.
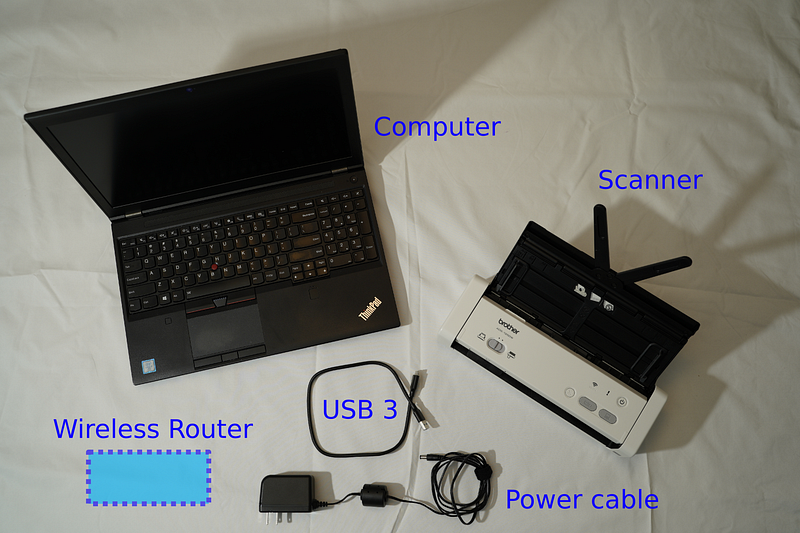
Here is a photo of the items you will need for the setup. The super-fancy curtain I used as a backdrop is completely optional. I did not include my router as it was up-and-running at the time the photo was taken; I leave it up to your imagination as to which wireless router to chose. Go wild with this one!
Get Connected
Apart from the physical hardware, you will need drivers and other software to initialize your scanner. You can download the full driver and software package from Brother’s website. Details on the installation process are available here. Once downloaded, open the installer and navigate through the licence agreement. After this is completed, select Wireless as the connection type.
Connect the power cable to your scanner.
Connect a USB-C cable between the scanner and computer. Brother mentions in their setup wizard to use an older-style micro-USB cable; I went the extra mile and used a spare micro-USB-C to USB-A cable that belonged to one of my 2.5 inch external drive enclosures.
Power on the scanner and wait for the green power light to stop flashing.
From the installer’s main page select ‘Wireless Setup’. Next, select ‘Set up with a USB cable’. If all goes well you should see your scanner in the window under ‘The following machines have been detected…’ This is is getting exciting, isn’t it?!?
Follow the prompts to select the wireless network with which to connect the scanner. Enter the passkey for your desired network and confirm the other settings are correct. Leave the IP address set to ‘auto’ for the time-being.
Click connect.
Provided all settings are correct you should get an indication that the scanner was successfully connected to your network.
But… you won’t.
Instead you’ll get a window that instructs you to disconnect the USB cable between your computer and the machine. Go ahead and do this.
Click next.
You should get a message stating You have completed the wireless network setup. Yay! Sit back and take a good sip of that beverage you made for yourself earlier.
Crossing the Finish Line
Back at the main prompt of the setup wizard, your scanner should appear in the list along with its newly-assigned IP address.
Select your machine then click next.
Choose Standard (Recommended).
If all goes well you will be asked to install two additional pieces of software called PaperPort and Power PDF. I opted not to install these two pieces of software. Clicking next you should see a page that says:
Software installation complete. Your machine is ready to use.
Nice! Clicking finish *should* launch the iPrint&Scan application. If you are feeling saucy you could do a quick scan to see if your ADS-1250W is in fact all good-to-go.
Postscript
Once you have completed this initial setup, unless you want to get right into scanning documents I recommend closing the set-up wizard and powering off your scanner. Finish things off by disconnecting the USB cable and for those who dual-boot, restart your computer in preparation for part 2 of this article.
This completes the non-Linux portion of the wireless setup of your Brother ADS-1250W.
At the time I wrote this article there were not that many alternatives from Brother for simliarly-sized scanners. I have since discovered there is a newer albeit more expensive version, the ADS-1700W. Good news everyone: it comes with a front-panel display which should hopefully make set-up a lot easier! You can find it here on Amazon. For the incredibly curious, the laptop I used to configure my scanner is the Lenovo P50, you can find it here. Please note that as an Amazon Associate I earn from qualifying purchases from these links. I would be most interested to hear your experiences with Brother’s newer version of what has proven to be a very handy scanner!
I am interested in your Linux scanning stories; please share in the Comments section. Do you have a similar story on connecting a bare-bones scanner like the ADS-1250W or its more feature-rich cousin the ADS-1700W?
Its like you read my mind! You seem to know a lot about this, like you wrote the book
in it or something. I think that you can do with some pics to drive the message home a bit, but instead of that, this is wonderful blog.
An excellent read. I’ll definitely be back.
Glad you enjoyed our articles and that you found them helpful! Please stay tuned for new articles and we wish you all the best on your open-source journey!
Hey! Someone in my Facebook group shared this website with us so I came to take a look.
I’m definitely loving the information. I’m bookmarking and will be tweeting this to
my followers! Terrific blog and excellent design and style.
Glad you liked the articles; more are on the way and we hope you will enjoy them as well!