

File Sharing Made Easy
Samba is a very handy utility for sharing files and folders on a home network. I have been using it for several years but every time I configure a new machine I have to re-trace my steps through various notes I left for myself. Not efficient at all!
Right. Time for a new article to tie all the pieces together!
In this tutorial we will be setting up Samba to use two shared folders, one to test and another for day-to-day sharing. You will want to change items marked with <..> to suit your particular situation. We will also be using two Linux machines, a server and client. Samba is cross-platform compatible meaning you can configure it on one type of machine such as an Ubuntu box, and share files to other computers running, say, Windows 10. Very useful indeed!
Server Setup
In a terminal on your server, navigate to the home directory and make a new test directory in the server user’s Documents folder as follows:
mkdir home/<user>/Documents/Test
Install samba:
sudo apt install samba
During the installation you may get the following message:
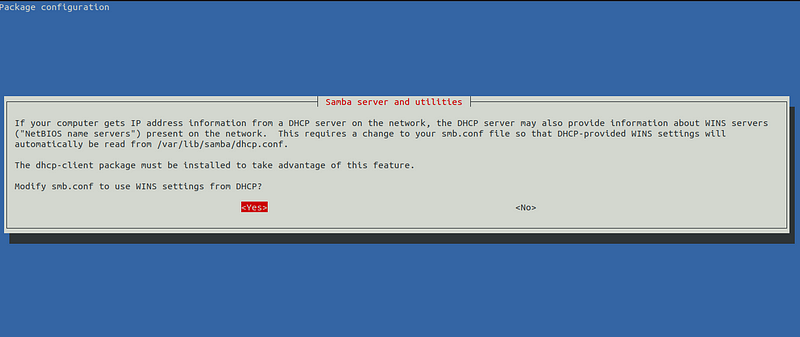
Provided your router yields information about WINS servers, select yes to proceed. I went out on a limb on this one and selected yes for my setup.
Once Samba is installed the next step is to edit its configuration file:
sudo nano /etc/samba/smb.conf
Add as the last item under Global Settings, just before Networking:
# Added YYYY-MM-DD by <author>.
usershare owner only = false
See this post for details. You may have to change the indentation to match what is in your particular configuration although this is cosmetic more than anything.
To help improve security you should specify a minimum version of Samba to run.
Find the global section and append the following line:
min protocol = SMB3
See this post for details on improving security.
Something else to note about the Samba configuration file is that any line beginning with a semicolon ; or hash # character is ignored, as are lines containing only whitespace. Add several new lines under the Share Definitions section:
Hit cntl-o to save, cntl-x to return to the Terminal.
Set the samba password for the user on this server:
sudo smbpasswd -a <user>
Run the following commands to start Samba:
sudo service smbd restart
sudo service nmbd restart
Remove a Samba user via:
sudo pdbedit -x <user>
See this post for further details on adding and removing Samba users.
Client Setup
You can do an initial mount of the Samba share on your server by going into Nautilus, Other Locations, Connect to Server and typing in the following:
smb://<server_IP>
If all goes well you should be prompted to enter the username and password that were set up in the above steps. I recommend choosing remember password immediately. If all goes well the above share should be mounted and available in Nautilus.
Next we are going to walk through how to mount the Samba share from the terminal using the Common Internet File System (CIFS).
Install CIFS using:
sudo apt install cifs-utils
Create a new directory to be used for the mount:
sudo mkdir -p /mnt/Test
Mount the Samba share as follows:
You may be asked first for your SuperUser password on your client, followed by the Samba password for the server_user.
If all goes well you will see… absolutely no indication on the terminal that the connection was successful. Super helpful.
Go to Nautilus, navigate to your Test folder and inspect it to reveal the contents of the corresponding Test folder on your server.
If you attempt to make changes to the Test folder on your client you will likely get the following error message:
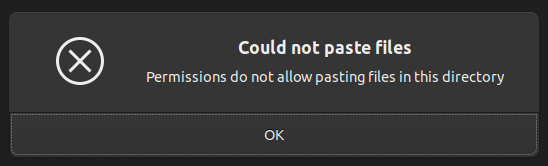
Interesting.
Reading through this post revealed that some additional settings need to be specified when mounting the shared folder.
Back in Terminal, re-mount the share by specifying the user and group for the client machine. You can check which groups your client user belongs to with groups <client_user>, choose the desired group when mounting the Samba share:
Navigate back to your Test folder in Nautilus and try to make changes to it, such as copying and pasting a file from your client. Provided everything is set up properly you should be able to see the file both on your server and client.
Configuring a Day-To-Day Share
Changing from a test folder to something you will use for day-to-day sharing is relatively painless. Things are just not spicy enough in this article so for this next section we will use SSH to configure our server.
I recommend having two Terminal windows open for this next part: Use the first Terminal window to SSH into your server where you will be configuring Samba and restarting it as required. See my article on Get SSH Working on a Raspberry Pi 4 for details on how to set up SSH on your server. Use the second Terminal window to configure your client.
Before making any more changes to the server and client, let us first do a bit of housekeeping. Before unmounting any shared folders, please ensure you abide by the following:
- The
unmountcommand can disrupt a running process, cause data loss OR corrupt open files. Programs accessing target DEVICE/NFS files may throw errors OR may not work properly. - Do not execute
umountwhen inside the mounted path (/nfs/path/to/share) itself. Instead, usepwdcommand to validate your current directory path (which should not be the mounted path), then usecd ..command to get out of the mounted path.
Proceed once you are sure you can unmount any stale folders in addition to removing them, see this post, this one and this one for details. Since we no longer plan on using the Test share on the client, go ahead and unmount the client’s share and then remove the folder. Run the following in the client’s Terminal:
sudo umount -f /mnt/Test
sudo rmdir /mnt/Test
In the second Terminal where you are working with the server, go ahead and edit the Samba configuration:
sudo nano /etc/samba/smb.conf
Under Share Definitions, change the Test folder settings to reflect the folder you will use for regular sharing:
Hit cntl-o to save, cntl-x to return to the Terminal.
Restart Samba using:
sudo service smbd restart
sudo service nmbd restart
Mount the Day-to-Day Share in Terminal
Make a new mount folder via the client’s Terminal:
sudo mkdir -p /mnt/EverydayShare
Mount the new share via:
Do a quick test to see if you can access the share:
cd /mnt/EverydayShare
ls -la
Congratulations!
You should now have a folder shared via Samba between your server and client machines.
Troubleshooting
The following are a few helpful steps in the event you need to troubleshoot Samba.
Get the current version:
smbstatus --version
A benefit of using Samba is the ability to share content across different operating systems.
With this in-mind, some of you may be wondering how to configure a Sama client in Windows?
Look no further: there is a helpful article here.
Recovering Samba Config following Upgrade
The moment has arrived where you are asked to upgrade your Linux distribution.
During the upgrade you may be prompted to over-write your existing Samba configuration.
I recommend choosing the Package Maintainer’s version as it may contain security-related updates.
The following steps assume you have a back-up of your SMB config kept in a safe place.
Edit SMB configuration:
sudo nano /etc/samba/smb.conf
Open your back-up configuration in a separate text editor.
Search ‘added’ in back-up configuration to identify each value needing to be re-added.
Put comment above each value ‘# Re-added 2XXX-XX-XX by <author> following upgrade.’
Re-start SMB service:
sudo service smbd restart
sudo service nmbd restart
Attempt log-in from a client machine to ensure service is operating correctly.
Summary
The following is an abbreviated set of steps to configure a shared folder via Samba/CIFS, for those that want to dive right into setting things up.
Server Setup
Install samba:
sudo apt install samba
Edit Samba’s configuration file:
sudo nano /etc/samba/smb.conf
Add as the last item under Global Settings, just before Networking:
# Added YYYY-MM-DD by <author>.
usershare owner only = false
Add several new lines under the Share Definitions section:
Hit cntl-o to save, cntl-x to return to the Terminal.
Set the samba password for the user on this server:
sudo smbpasswd -a <user>
Restart Samba:
sudo service smbd restart
sudo service nmbd restart
Client Setup
Install CIFS using:
sudo apt install cifs-utils
Make a new mount folder via the client’s Terminal:
sudo mkdir -p /mnt/EverydayShare
Mount the new share via:
Do a quick test to see if you can access the share:
cd /mnt/EverydayShare
ls -la
Postscript
There are many additional settings that I did not go into detail in regard to the Samba configuration file. This article barely scratches the surface of what Samba can do in regard to unique permissions and access control for your various shares and users. There was one interesting side effect of not specifying uid and gid when mounting via CIFS whereby we were able to read but unable to write to the share. This may come in handy if one of your users requires read-only access. That being said, this approach is far from perfect and should not be used in a day-to-day scenario.
Have you used Samba in your projects? How well is it working for you?
Pingback: Network-Attached Storage at 50,000 Feet – steadynotion.com